
WARNING! You are about to read WAY MORE about pedals than you ever imagined you would! As the rest of the bike is soaking in Kroil I thought I would spend a full day taking apart the complete pedal assembly. The post will detail all the steps involved. All fasteners were loosened with Kroil and heat.
- First was to loosen up the two peg shaft outer nuts. And they came loose after appearing to be “rust-welded” (my term). A great first step!

2. Once they were loose, they came off with no damage to threads on shafts or nuts.

3. The dust shield could now be broken away from the support and removed.

4. The center nut and special washer were now able to be “Kroiled” and allowed to soak a bit before attempting to be loosened.

5. The nut and washer came off unscathed.
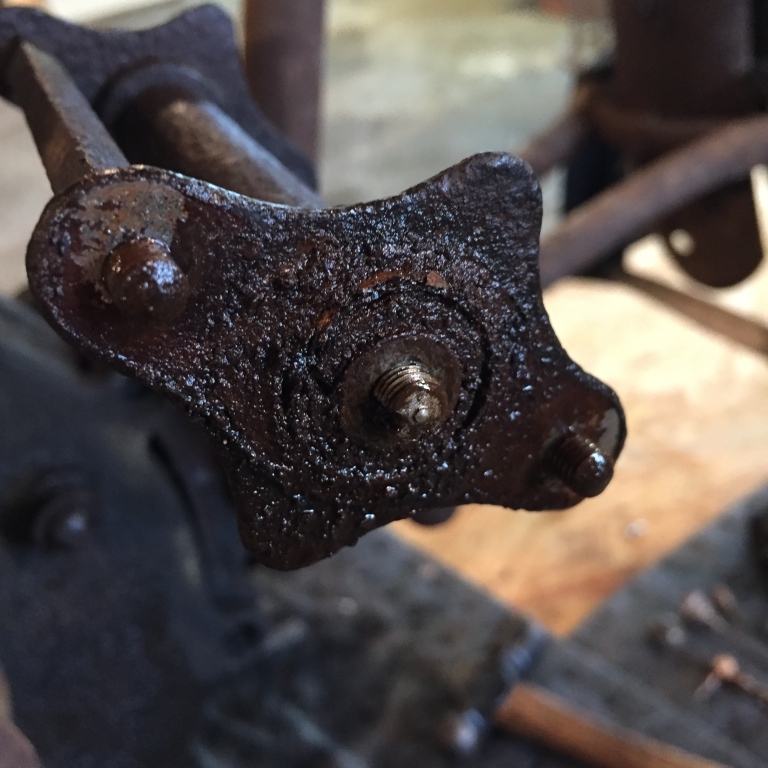
6. Next the main support was able to be removed.

7. The pedal shaft inward nuts and shafts were able to be removed next. Again all with no damage. Making great process so far!

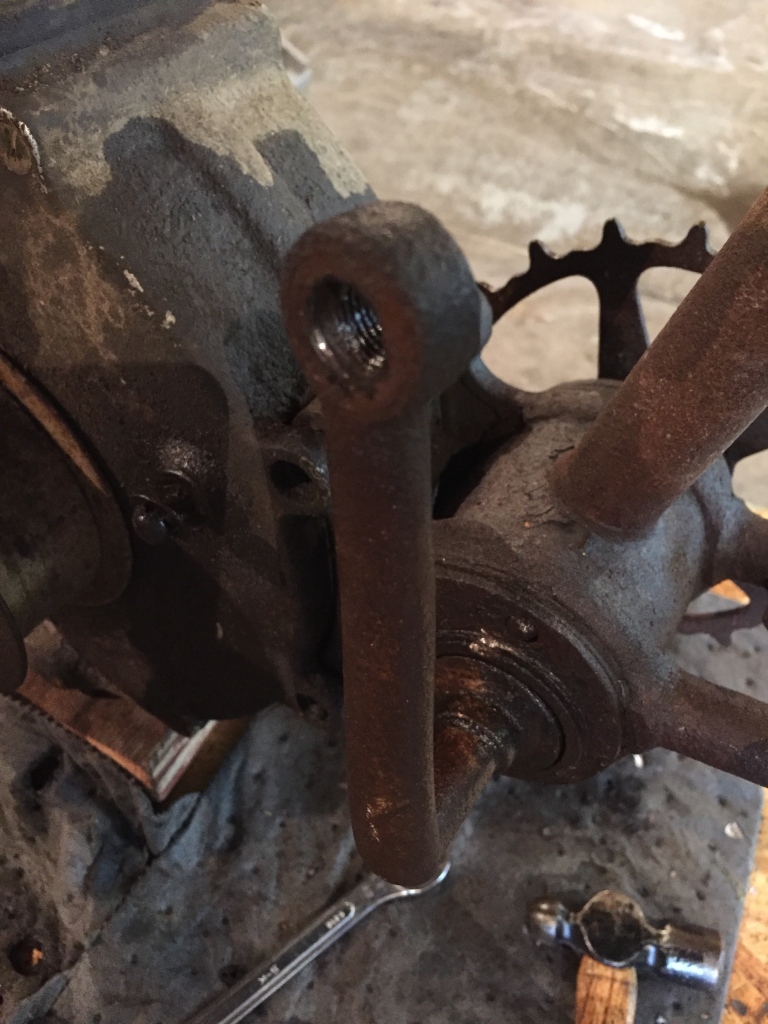
8. Last was the left hand thread peg mount. This was really locked on! Took a while of heating and Kroiling to get a budge. Once the little budge was attained I knew it would be all good. Back and forth (tightening and loosening in small increments) movements led to the removal with no damage. Now to source a LH tap and die for the crank.
9. Moving over to the right side of the crank, there are three screws that had to be removed. One came out OK. This one snapped off: the FIRST damaged fastener!

10. And one had to be drilled out

11. A perfect drill right through the entire screw!

12. One size larger drill and the screw could be removed.

13. FREE at last!

14. A tale of the three screws: one unscathed, one broken and chiseled out, and one drilled out.

15. Time to tackle the bearings now.

16. The outer bearing race spun off easier than I thought. LH threads.

17. This exposed the bearings and retainer clip.

18. Hmm…..what the hell is that “stuff” inside the frame? All bearings accounted for. NOT useable!
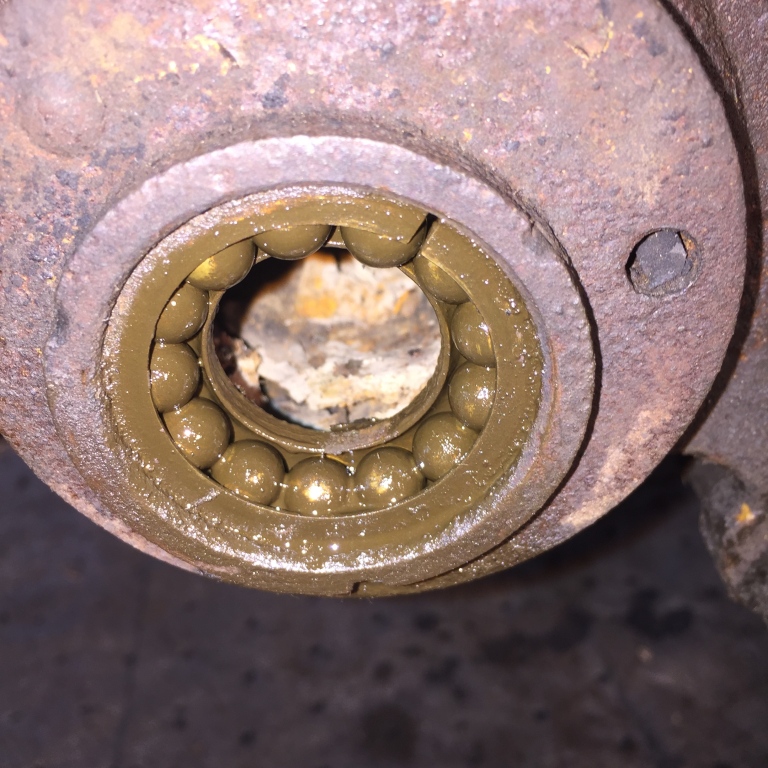
19. Left side bearings all there also, but NOT useable.

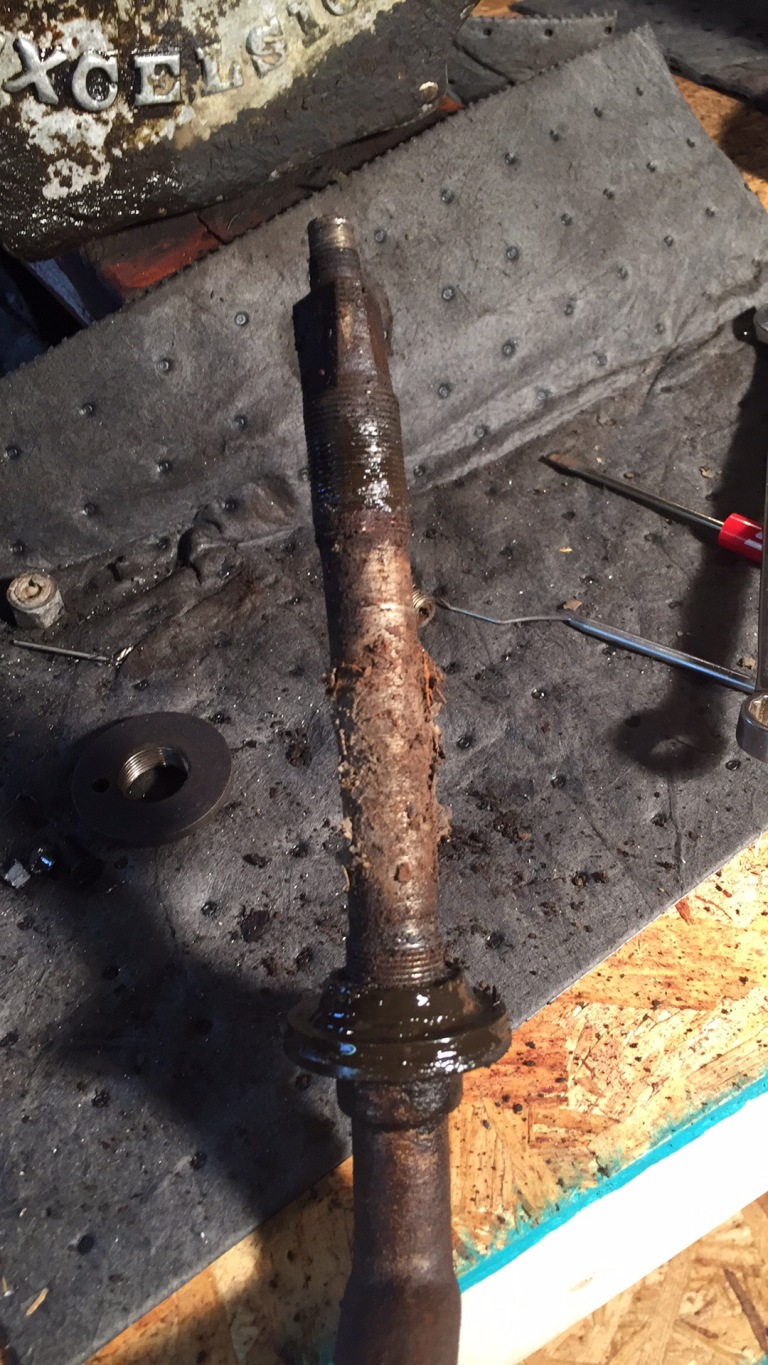
20. Shaft is bent….might be able to straighten. Outer threads stripped, but can be welded and re-tapped.
21. Right crank is slightly twisted. Might also able to save this and twist back to normal position.

22. All in all both bearing races look great and usable again. New bearings though for sure.


And that my friends is a 8 hour day! More on the crank assembly later. Thanks for hanging in there and taking this all in. Here’s a preview of what’s next:


I like to follow your adventures. Thanks a lot for sharing, Chris
LikeLiked by 1 person
Appreciate the comment! Enjoy!
LikeLike
Thanks for taking the time to entertain us..it is fun to watch, read and learn
LikeLiked by 1 person
Fun for me too! Glad you enjoy.
LikeLike
Hey Chris, I can only see the very last picture of the wheel! All the rest just show a little box with an X in it with the IMG number next to it.
LikeLiked by 1 person
I can see them all when I open the page up. Try closing browser and re-open. Let me know.
LikeLike
Great Project !!!!!!!!!!!!!!!!
LikeLiked by 1 person
Thanks Pete!
LikeLike
Chris, having same prob opening pics. Followed your counsel. No results.
LikeLike
I’ll repost all pics. They are there every time I look.
LikeLike
Thanks. Finally think I’ve got my username figured out. You’re sure to hear from
more Kathies than me on this amazing journey. I enjoy each post and pictures. Kudos!
LikeLiked by 1 person
Still can’t open pics on this side of cybershpace for last two sections.in last 2 sections.
In meantime, the biker brotherhood awaits the missing shock & awe series of photos. Keeps
us coming back and re-reading this wonderful story as we pine on for visuals. 🙂
LikeLike